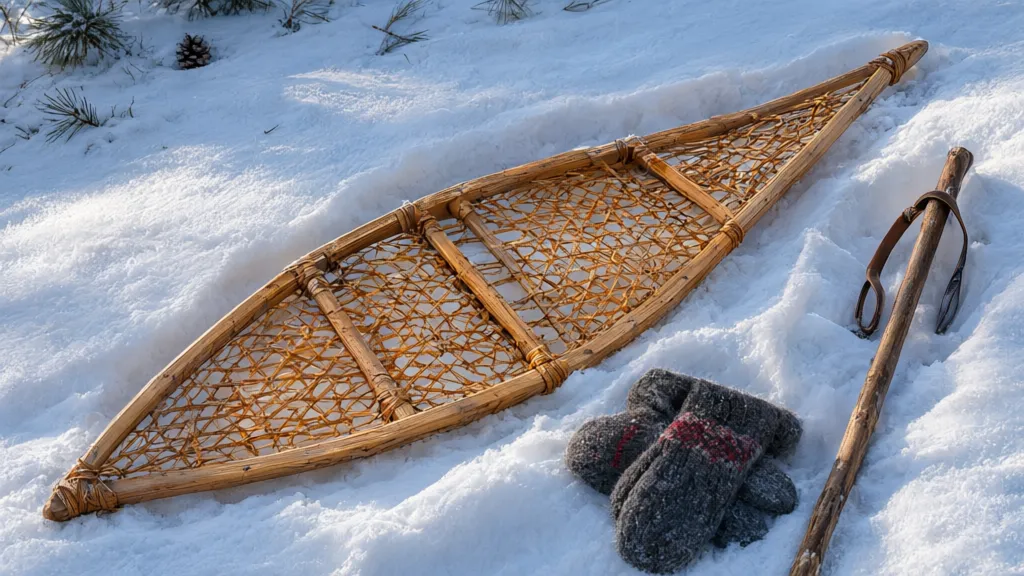
Snowshoes developed as a practical response to deep, loose snow: spreading a person’s weight over a larger area reduces sinking and makes travel possible when ordinary footwear would bog down. Their exact place and date of origin are uncertain. Archaeological evidence and historical accounts point to a long history of snow travel across northern Eurasia and North America, but similar equipment could have emerged independently wherever people needed to cross snowy terrain.
Across North America, Indigenous communities shaped snowshoes to suit local snow, landscape, and travel needs. Makers commonly bent resilient wood into a frame and laced it with strips of rawhide, creating a lightweight surface that supported the wearer while allowing snow to pass through. Frame outlines, dimensions, and lacing patterns varied among communities; this diversity reflects adaptation to different conditions rather than a single standardized design. Snowshoes were essential for winter hunting, trapping, trade, and movement between settlements.
European newcomers adopted snowshoes through contact with Indigenous peoples. French speakers called them raquettes, a reference to their resemblance to racket-shaped objects. By the seventeenth and eighteenth centuries, snowshoes had become established equipment for colonial travel and military campaigns in snowy regions. European and later North American makers modified Indigenous designs, while local knowledge continued to shape practical use and construction.
Traditional wood-and-rawhide construction remained common for centuries, but industrial materials transformed snowshoe production during the twentieth century. Aluminum frames offered durable, relatively light alternatives; synthetic decking resisted moisture and required less maintenance than rawhide. Modern bindings and metal traction components improved attachment and grip, while manufacturing allowed designs to be standardized for different users and conditions. These changes made snowshoes more accessible for recreation as well as work, without removing the underlying principle that has guided their development: matching surface area and construction to snow conditions and the demands of travel.

Temptations Creamy Puree Cat Treats, Chicken, Salmon & Tuna, 24 Count | Chicken, Salmon, Tuna flavors, under 15 cal/tube, no added sugar/fillers, squeezable treat or meal topper, great for seniors
(as of November 8, 2026 06:26 GMT +00:00 - More infoProduct prices and availability are accurate as of the date/time indicated and are subject to change. Any price and availability information displayed on [relevant Amazon Site(s), as applicable] at the time of purchase will apply to the purchase of this product.)Snowshoes are best distinguished by frame shape, flotation area, tail length, deck material, and traction. These features determine how well a shoe supports the user in powder, maneuvers through trees, or grips a steep, firm slope; a larger shoe is not automatically better if it’s cumbersome on packed trails.
Traditional wood-and-rawhide snowshoes use a bent wooden frame laced with rawhide or similar material. Their broad surface provides flotation in deep snow, while the open lacing lets snow sift through rather than collect as a solid slab. Long, narrow forms suit relatively level travel, and shorter, wider forms turn more easily in wooded terrain. Rawhide can stretch or deteriorate when repeatedly wet, so these designs require drying and periodic maintenance.
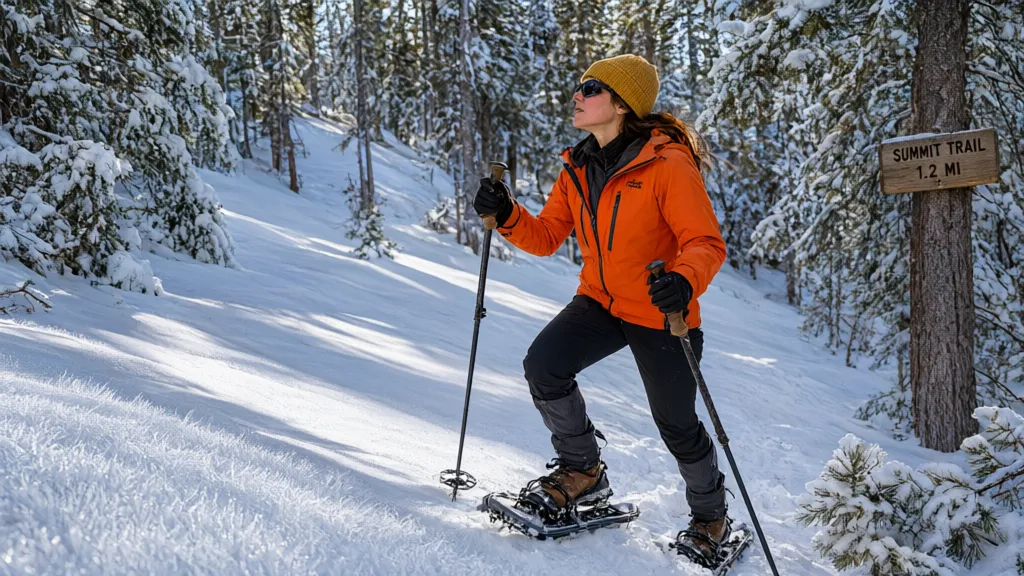
Recreational models typically have aluminum or composite frames with synthetic decking and bindings that secure ordinary winter boots. Oval or tapered shapes are designed for packed trails and moderate off-trail use. Many include a pivoting binding: the heel lifts during each step, while the toe attachment keeps the shoe aligned. A heel lift, also called a climbing bar, raises the heel on sustained ascents and reduces strain on the calf and ankle.
Mountaineering snowshoes are built for steep, hard, or variable terrain. Their shorter profile improves maneuverability, and aggressive crampons or metal rails beneath the deck provide purchase on icy slopes. Some designs add toe crampons and side traction points, which help resist sliding when traversing across a slope. These components can catch on clothing or brush, so controlled foot placement matters in confined terrain.
Running snowshoes are compact and light, with flexible bindings and enough traction for packed or shallow snow. Their smaller surface area reduces flotation in deep powder, making them unsuitable when sinking would impede safe travel. At the other end of the range, large flotation-oriented models have broad decks and may include tails to enhance support and tracking in loose snow; their size makes them less agile on narrow trails.
When comparing designs, consider the combined load of the user, clothing, and pack, as well as the expected snow and slope. Manufacturers’ weight ranges are useful starting points, but deep, unconsolidated snow generally requires more surface area than firm, packed snow. Binding compatibility also matters: insulated boots must fit securely without pressure points, and traction hardware should match the steepness and firmness of the route.
Adjust each binding so the boot heel is seated and the foot cannot slide sideways, while leaving enough room for circulation and warm socks. Check that straps do not press on the toes or snag, and confirm that the binding pivots freely if the model has a pivoting design. A loose binding makes the snowshoe twist; an overtight binding can cause pressure, numbness, and cold injury.
On level ground, use a relaxed stride and lift each shoe only high enough to clear the snow. Older, wider designs may require a slightly wider stance to prevent the frames from striking each other; narrow modern models usually allow a more natural gait. In deep powder, a smooth shuffle conserves energy better than repeatedly lifting the entire shoe. Keep steps short enough to maintain balance, and avoid crossing one foot over the other when turning.
On an ascent, shorten the stride and use the toe crampons rather than trying to grip with the full deck. Engage the heel lift on a sustained climb to reduce calf strain, then lower it before traversing or descending. On firm slopes, place the shoe deliberately so its traction points contact the surface; poles with snow baskets help stabilize the body and reduce load on the legs.
For a descent, take controlled, short steps and keep your weight centered over the shoes. Let the crampons and heel traction engage instead of leaning far backward, which can cause the feet to slide out from under you. When traversing across a slope, use the side rails or edge traction and maintain a stable stance; if the slope is too firm or steep for reliable purchase, choose another route rather than relying on snowshoes alone.
Turning is safest in a series of small steps, especially in tight trees or on a slope. Avoid pivoting sharply on a planted shoe, which can twist the knee. In soft snow, step around rather than stepping on the tail of the other snowshoe. When breaking trail, rotate the lead position before fatigue slows the group; the first person expends substantially more effort compressing untouched snow.
Match pace and route to changing conditions. Snowshoes improve flotation but do not prevent falls, conceal hazards, or provide avalanche protection. Check snow stability and weather before entering avalanche terrain, avoid snow-covered streams and unsupported edges, and carry navigation and emergency equipment on remote routes. Stop to address repeated slipping, binding movement, numb toes, or wet boots before these problems progress to a fall or cold injury.